
What are scan markers?
Scan markers are the dental components that serve as common geometrical landmarks to align your PIC file containing implant positions and angulations (which is exported as an STL) with soft tissue scan data.
These matching reference points enable dental CAD software such as exocad®, 3Shape® and others to accurately align the implant position and angulation data measured by your PIC app or PIC system with the intraoral scan of the patient's soft tissue, as well as other records (pre-op, design...)
Types of scan markers
The PIC system and PIC app support different scan marker types to match your clinical workflow:
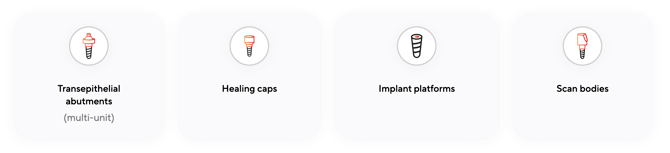
- Transepithelial abutments (multi-units)
- Healing caps
- Implant platforms
- Intraoral scan bodies
Understanding PIC files and scan markers
The output of a PIC app or PIC system capture is a PIC file.
A PIC file is unique: it doesn't contain mesh-based geometry like standard 3D files.
Instead, it stores only spatial vector information showing the measured positions and angulations of interrelated implants.
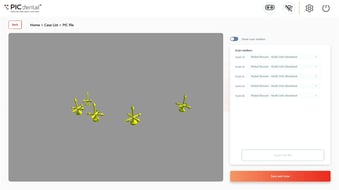
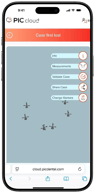 This is why, when you preview a recently captured PIC file on either PIC app or PIC system, it is initially displayed with vector arrows representing the location and angle of each implant in 3D space.
In order to export a PIC file, scan markers must be assigned for each implant position.
Choose scan markers that match the components physically scanned in the patient's mouth with your intraoral scanner after the PIC file capture.
The choice of scan markers for a PIC file depends on what physical components will be used for the intraoral scan taken after the PIC file capture: multi-units (transepithelial abutments), healing caps, intraoral scan bodies or even some implant platforms. The same components must be assigned as scan markers to the PIC file to export it.
When exported, the PIC file places perfect digital representations of the chosen scan markers at the exact position and angulation of each implant. The intraoral soft tissue scan will contain the same scan markers that were physically placed on the patient's implants. Your dental CAD software can then use the scan markers as common landmarks to align the exported PIC file with the soft tissue scan.
PIC app
With PIC app, you can streamline your workflow by setting your favorite scan markers in PIC cloud in advance for quick access to assign them directly from the app.
Setting favorite scan markers for PIC app cases in PIC cloud
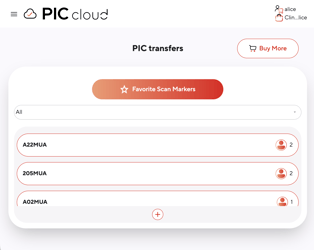
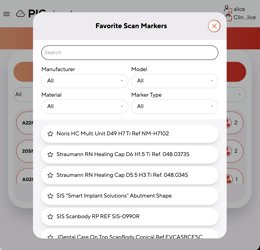
- Tap on the upper left corner's menu icon and tap on the PIC transfers page
- Tap on Favorite Scan Markers
- Use the search bar or any of the Manufacturer, Model, Material or Marker Type drop-downs to locate your preferred scan markers in the list
- Tap on the star icon to the left of your most used scan markers
- Your favorite scan markers will now be available directly in PIC app when exporting the PIC file
Assigning scan markers to a case for PIC app cases
To assign scan markers:
- In PIC app: Tap and hold on any arrow vector representing an implant position in the 3D preview to initiate scan marker assignment
- In PIC cloud: Tap the "Change markers" button and select the appropriate scan markers from your favorites
Previewing Your Selection
Toggle "Show scan markers" to preview the PIC file with scan marker geometry rendered in the 3D view. Drag across the preview to inspect from different angles before exporting.
PIC system:
Updating Available Scan Markers
To add new scan markers to your PIC system, contact support with:
- Manufacturer name
- Component reference number
Our support team will update your digital library with the requested scan markers.
Assigning Scan Markers to a Case
- Tap "Show scan markers" toggle to preview the PIC file with rendered geometry
- Tap on the scan marker name next to the corresponding tooth position
- Select from the dropdown menu of currently installed scan markers
- The 3D preview updates immediately
Fast Selection Shortcut
Time-saving tip: If your case was captured with a single PIC transfer kit and you're using the same scan marker for all implants:
- Select the scan marker for any individual tooth position
- Press "Save"
- The system automatically applies the same scan marker to all remaining positions
Final Steps
After previewing and assigning scan markers, drag across the 3D preview to inspect the PIC file from different angles, then proceed to export your file.
Need Help?
If you need assistance adding new scan markers or have questions about scan marker selection, contact our support team with your manufacturer and component reference information.