
- PIC suite runs on PIC platform OS, a proprietary operating system implementation that for security and performance reasons does not provide the possibility to install any third-party software (such as a program that performs screen recordings).
- In order to ease sharing and capturing the interface of PIC suite, PIC platform OS is set up to always duplicate the screen contents via an HDMI connection. This can be used to connect to an external screen or projector, as well as to capture a screen recording using an HDMI capture card (see below).
- Newer PIC system models (PIC system (case), PIC system Gravity) have a dedicated HDMI port for this purpose.
- PIC system Legacy units also can share the screen contents via HDMI with an adapter.
What do you need
1. HDMI video capture card + HDMI cable
An HDMI video capture card is a common portable device that allows you to record or stream any HDMI video signal, such as the one produced by PIC system.
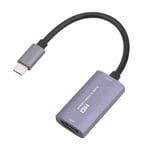
It normally consists of a small dongle that has an HDMI port on one end and a USB-A or USB-C plug on the other end. The device transforms the HDMI signal it receives into a USB webcam signal that can be easily recorded or streamed on both Windows and Mac computers.
HDMI video capture cards are commonly available at consumer electronic stores and online retailers such as Amazon. You will also need a standard HDMI cable of your desired length.
While we don't recommend any specific HDMI video capture brand, our internal testing shows that entry-level models in the $15-30 price range are usually sufficient.
Higher-end, more expensive HDMI video capture cards may offer more reliability or additional features such as an HDMI pass-through output (besides receiving and processing an HDMI signal to USB, they can at the same time output a duplicate of that signal to another HDMI device such as a screen or a projector for simultaneous display of PIC suite on a separate screen).
2. Auxiliary computer/laptop
A separate computer is necessary to receive and record the USB webcam signal that's outputted by the HDMI capture card. Any modern consumer computer or laptop with Windows o Mac should be sufficient.
3. HDMI adapter (Only for PIC system Legacy)
Depending on when you purchased your PIC system Legacy, the system's Microsoft Surface® computer will require one of the following two adapters to provide an HDMI video output:
If you have a PIC system Legacy with both USB-C and USB-A ports, make sure you only use the USB-C port for your HDMI adapter and keep using the rectangular USB-A port for the Ethernet adapter that connects the computer to PIC system's Image Processing Unit.
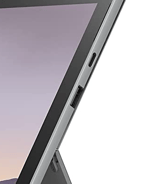
Option 1. Both USB-C and USB-A ports available
If your PIC system Legacy's computer has a dedicated USB-C port, use a USB-C to HDMI adapter to connect the PIC system to an HDMI video capture card: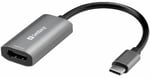
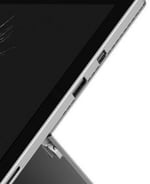
Option 2. No USB-C port available
If your PIC system Legacy's computer does not have a USB-C port, it will have a Mini DisplayPort. Use a Mini DisplayPort to HDMI adapter to connect the PIC system to an HDMI video capture card: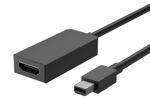
Initial setup
- Connect your PIC system with an HDMI cable to your HDMI video capture card (follow the manufacturer's instructions of your HDMI video capture card).
- PIC system Gravity: HDMI port located in the back, labelled "HDMI"
- PIC system: HDMI port located next to the AC port, labelled "HDMI"
- PIC system Legacy: using the appropriate adapter
- Connect your HDMI video capture card via USB to the computer that will be used for recording the signal (follow the manufacturer's instructions of your HDMI video capture card).
- Follow the instructions below to record PIC suite, depending on whether you are using a Windows or Mac computer.
Step-by-step process for Windows computers
 Download OBS Studio. OBS Studio is a free and open-source Open Broadcaster Software for video recording and live-streaming. This software works for both Windows and Mac computers, and it has many features related to video capture and streaming. The software can be downloaded from their official website. They also provide an official manual for more details on how to use OBS studio.
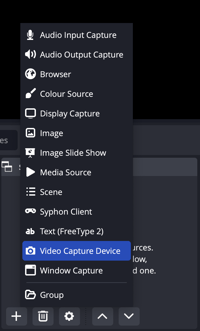
- Launch OBS Studio. Initially, the preview will be a black screen. To display PIC suite's signal and record it, press on "Sources" and choose "Video Capture Device".
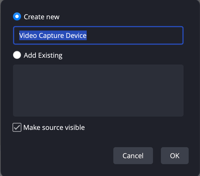
- You may rename the source to an appropriate name and press "OK".
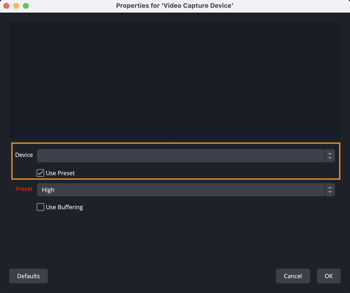
- From the device list, select the HDMI video capture card plugged into your computer and press "OK".
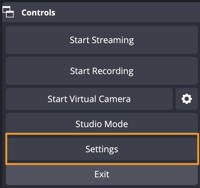
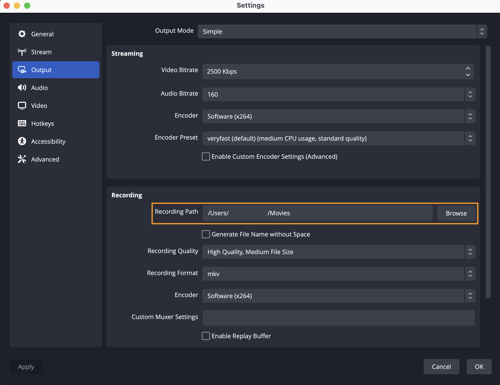
- To modify where the recording will be saved on your computer, click on "Settings" in the control panel, then "Output". Find "Recording Path" and click "Browse" to choose the folder you wish to save the file.
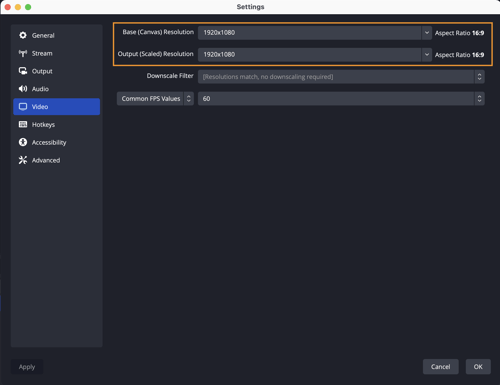
- To modify the screen size, click on "Video" within the settings, and there is the option to adjust both the Base Resolution and Output Resolution.
- You should now see the screen signal from your PIC suite in the preview. Press "Start Recording" from the control panel once you are ready to capture the PIC suite interface.
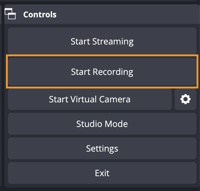
- OBS will continue recording the signal from the PIC system until you press on "Stop Recording". The recording will be saved to the folder you assigned and will be available for your use.
Step-by-step process for Mac computers

On Mac computers, a USB webcam signal can be recorded as a video file with the built-in QuickTime Player application. This media player application developed by Apple is included by default on all macOS versions and has a simple interface.
- Open QuickTime player on your Mac computer.
- Select the menu bar option "File" and press on "New Movie Recording".
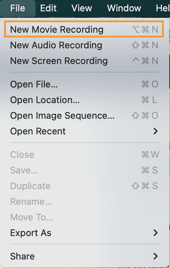
- The computer's internal webcam will automatically turn on as it's the default webcam device. To switch to the HDMI video capture card that is outputting PIC suite's video signal, press on the small arrow next to the recording button.

- From the drop-down menu, select the HDMI video capture card.
- You should now see a preview of PIC suite's interface. Press on the red recording button to start recording.
- QuickTime Player will continue recording the signal from the PIC system until you press on the stop button.
- After stopping, you will be able to preview the resulting video file. To save it, press Cmd+S on your keyboard or select the menu bar option "File" and press on "Save"